
How to Make Sourdough Starter

If you’re searching for the easiest method to kickstart a sourdough starter, look no further!
This straightforward, easy-to-execute recipe is perfect for you!
You’ll be able to whip up the most delicious sourdough loaves, pizzas, bagels, and more for your loved ones in no time!
Check out this Easiest Sourdough Bread Recipe for Beginners.
A sourdough starter is essentially a living community of good bacteria and wild yeast formed by combining flour with water and allowing it to ferment. This natural yeast culture is reliable and can be kept alive by consistently feeding it and ensuring it’s in a suitable environment.
The effort is totally worth it. Once it’s up and running, a robust and active sourdough starter will yield tasty bread for years to come.
IMPORTANT NOTES
I strongly recommend beginning by thoroughly reading the recipe until the end. Once that’s done, gather all your supplies and ingredients, then start following the instructions for Day 1. Choose a time each day to regularly feed your starter, as this is a critical phase. Be aware that, despite only needing to spend 5–10 minutes each day actively working with your starter during this setup phase, it might take anywhere from 5 to 14 days.
It can be helpful to keep a record of the days and pay attention to any changes in smell or appearance of your starter. This helps you keep an eye on how it’s doing and address any issues that may arise.
The science behind sourdough starter
Sourdough starters are symbiotic communities of lactic acid bacteria and wild yeast. When flour is hydrated with water and allowed to ferment, both yeast and bacteria feed on the carbohydrates contained within. As you replenish the starter with new “food,” each microbe grows stronger and more vivacious, emitting gases (air and lift) as they consume. These living microorganisms coexist within your starter, resulting in a lactic and acetic acid-rich environment. These acids offer both flavor and nutritional value.
The specific microorganisms—yeasts and lactic acid bacteria—found in a particular sourdough starter are largely dependent on the conditions under which it is kept alive, including the amount of ripe carryover, the flour used for feedings, and the maintenance temperature. Most frequently, there are yeasts, mainly Saccharomyces cerevisiae and Candida sp., and several lactic acid bacteria species, mostly Lactobacillus sp., Leuconostoc sp., and Weissella sp.
Should I make my own sourdough starter or use an established one?
After following instructions to make your own starter, you might discover that it tastes bad, smells bad, or doesn’t produce very tasty bread or other baked goods. An established culture enters the picture here.
An established culture is easier because it can be started more quickly and easily. It is also more dependable because it already contains live yeasts that are robust, stable, and active due to their long history of propagation.
Moreover, an established culture can ensure a bread product with a more pleasing flavor due to its established bacteria and yeast.
So unless you have been successful with making your own sourdough starter, you should use an established one.
What is the difference between a fed starter and an unfed starter?
A ripe, multi-hour fermented sourdough starter, or “fed” starter, is prepared for use in a bread recipe. A sourdough starter that hasn’t been fed in a long time is referred to as “unfed” and should be disposed of. Put another way, you’re using part of the starter’s waste produced during a typical feeding schedule when you use an unfed starter.
How long does it take to make my own sourdough starter?
The duration can vary based on several elements, ranging from 7 to 14 days to develop a strong and thriving sourdough starter. The key consideration is the temperature of your kitchen. Ideal conditions for starters are warm, around 75°F (24°C). However, in areas with cooler temperatures, it’s still possible to create a sourdough starter.
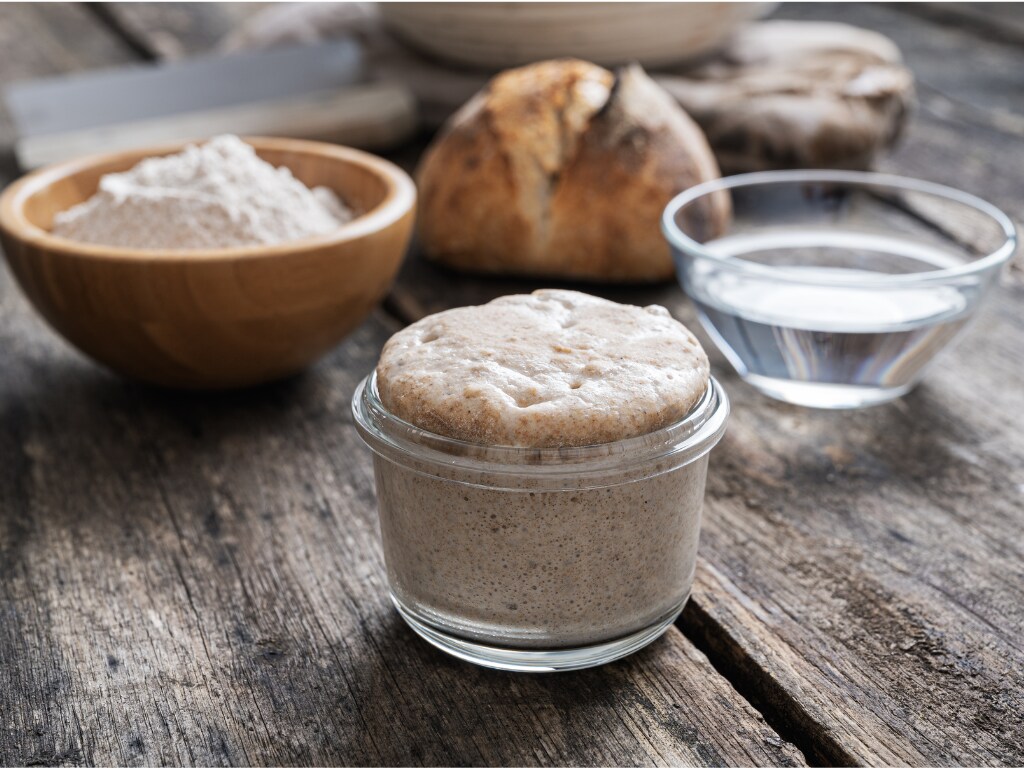
What do I need to make my own sourdough starter?
To make your own sourdough starter, you’ll need flour, water, and basic equipment and conditions.
The conditions required to create a sourdough starter include:
- A warm temperature of roughly 65° to 85°F (18° to 29°C).
- A glass or plastic container that is non-reactive for preparing and storing the starter.
- A non-reactive stirring tool to add air.
- A space free from other cultured foods nearby for fermentation.
- A breathable lid, like a clean towel or coffee filter.
What kind of water should I use to make sourdough starter
You can use bottled water, filtered water, or most tap water in your starter. To remove chlorine from tap water through evaporation, fill a bottle with tap water and leave it uncovered for 24 hours before use.
Equipement
- One or two clear-sided, glass or plastic containers with a 32-ounce capacity
- A gram-based scale (strongly recommended) or measuring spoons and cups
- A stirring tool, ideally composed of plastic, silicone, rubber, or wood
- One or two bands of rubber
- An instant-read thermometer is very useful but optional.
Sourdough starter instructions
Storing and maintaining sourdough starter
After creating your own sourdough starter, you will need to keep it going in order to use it for baking consistently. Fortunately, as your starter ages, it becomes more resilient. Your small natural yeast colony will benefit greatly from time, but you cannot “set it and forget it” forever.
Your starter becomes more durable once it is established. This means that you can keep it longer without feeding it, but you will need to reduce the rate of fermentation to avoid killing off all of your natural yeast. Fortunately, we have the refrigerator for this. After feeding your starter, let it sit at room temperature for about an hour. Then, cover it tightly and store it in the refrigerator for a week (or two, if necessary). Three to four times before baking, remove the starter and feed it. Through these feedings, the starter is “woken up” to a vigorous enough state to produce a good rise.
How to measure the ingredients?
Bread baking combines science and art. Using exact recipes and formulas ensures consistent results. If you’re a free-spirited baker, you can learn the technique and use whatever ingredients you have available.
To understand the science of measuring ingredients, it’s best to begin with precision. Ingredients can be measured using either volume (cups, tablespoons) or weight (ounces, grams).
To accurately measure flour volume, use a measuring cup and level it with the back of a knife. You can accomplish the same thing with measuring spoons
Feeding sourdough starter
Feeding your sourdough starter is a part of the weekly baking process. To keep your sourdough culture alive during non-baking weeks, I recommend feeding it.
To feed your sourdough culture, remove the starter from the fridge. If liquid accumulates on top of the starter culture, simply pour it off.
Discard everything except about 1/4 cup of starter. Combine flour and water in equal amounts (by weight). If using measuring cups, add 1/4 cup water and a scant 1/2 cup flour.
Stir vigorously to incorporate air. Cover loosely and let the starter proof at room temperature for a few hours. After proofing, return the starter to the refrigerator.
How to dry sourdough starter for long-term storage?
If you want to mail some starter to a friend or take a break from actively feeding it, you can dry starter. If you buy it instead of making your own starter, it will arrive in this manner. When the starter is at its best, spread it thinly and evenly across a piece of parchment paper rather than discarding any of it. After letting it dry fully—which may take a few days, particularly in humid conditions—break it up into tiny pieces and store it in an airtight container.
You can now give some of this starter away, store it for later use, or keep some on hand in case something happens to your “main” starter. Weigh out a quantity of starter and crush it into small pieces to rehydrate it. Use the same amount of water to rehydrate it, and then feed it the same amount of flour.
Let it rise and fall, then carry on with feeding as usual. It may take three feedings or more, depending on how strong the dried culture is, or it may happen quite quickly. As always, strictly adhering to time is less important than paying attention to the sensory cues provided by your starter.
Can I lessen the amount of sourdough starter so I don’t have to give it as much food?
There’s no need to feed your starter almost a cup of flour each time. Once your starter is well-established and active, you can decrease the amount you keep in between bakes. From an old batch of starter, I’ve saved as little as 20 grams; I fed it only 20 grams of flour and 20 grams of water before storing it in the refrigerator.
Before baking, you will need to feed more starter—do not discard—a few times; however, once baked, you can store that same tiny amount in the refrigerator.
Dehydrated sourdough starter
You can use this sourdough starter at any point over the next few months. The starter should be kept dry and cool.
When feeding your sourdough starter, use filtered, non-chlorinated water whenever possible.
To activate this starter, use the same type of flour (white, whole wheat, rye, etc.) that the starter was grown in. You can feed your starter and bake with a different type of flour if you’d like after it’s fully activated.
How to dry sourdough starter?
The easiest and most suitable method for drying a sourdough starter is air drying. Spread the starter onto parchment paper, then allow it to air dry for a full day or two. The precise duration will vary based on the thickness of the starter.
Can I dry sourdough starter in a dehydrator?
Sourdough starter can definitely be dehydrated in a dehydrator. Line the trays with parchment paper before spreading the starter on them. You do not want to set the dehydrator above 98.6F (37C) because it will kill the bacteria.
Activating dehydrated sourdough starter
- Transfer the contents of the package into a clean, wide-mouth canning jar (quart or larger) or similar container.
- Stir in 1/4 cup of room temperature tepid water. Incorporate 1/4 cup flour and mix thoroughly. Make sure the mixture contains a substantial amount of air. Loosely cover. You may place a plastic lid on top or a towel secured with a rubber band.
- Keep for about 12 to 18 hours in a warm place (70° to 85°F). The starter will fire faster in warmer environments. A food dehydrator with a high shelf or an oven with only the pilot light or oven light turned on can both work effectively.
- Add a scant 1/2 cup flour and 1/2 cup water, and mix. Make sure the mixture contains a considerable amount of air. After 12 hours, cover and put the object back in a warm place. Because active sourdough starter can bubble over, make sure the container is big enough and place a cloth or paper towel underneath.
- Throw away all but 1/2 cup of the flour and water mixture. Stir in slightly less than 1 cup flour and 1/2 cup water. Until the mixture becomes light and bubbly, repeat this procedure every 12 hours. This process could be finished in the first few days if the mixture is kept fairly warm.
Activating refrigerated sourdough starter
The sourdough starter goes into a state of hibernation when it is refrigerated, which not only allows the starter to go at least a week without feeding it but also temporarily stops the yeast from acting as a leavening agent. Before using the sourdough starter for a baking project, it is best to feed it three times at least to fully activate the yeast and bring it out of its cold-induced hibernation.
Take 1/4 cup of the sourdough starter out of the refrigerator to begin the process of making fresh starter. In case of your starter has formed a liquid layer on top, pour off the liquid layer first.
If you’re using a kitchen scale, weigh out the amounts of flour and water and add them to the starter. For instance, combine 50 grams of flour and 50 grams of water to make 50 grams of sourdough starter. Because flour densities vary significantly, the scale method is recommended.
Use one part sourdough starter to one part water to slightly less than two parts flour if you are using measuring cups. For example, stir in 1/4 cup water and a scant 1/2 cup flour if you are starting with 1/4 cup of refrigerator-stored starter.
Let the mixture sit for 4-12 hours to “proof” (become active). The amount of time will be determined primarily by the nature of the sourdough starter and the room temperature. After proofing, sourdough becomes lighter and more bubbly. To prevent the sourdough starter from overflowing, use a large enough jar and place it on a paper towel to protect surfaces. If the sourdough does not become bubbly within 12 hours, continue with the next feeding.
Repeat the process at least twice more. For each feeding, use equal amounts of starter, flour, and water by weight, or follow the measuring cup ratios above. To avoid overfeeding, estimate the amount of sourdough starter needed for your baking project, such as 3-4 cups for bread. To make sourdough pancakes , discard any excess sourdough starter before the next feeding.
Should sourdough starter be kept in the light or the dark?
A sunny window sill can be a great place to keep your starter, but make sure to cover the jar or wrap it in a sock so it does not get direct sunlight. A happy starter prefers warm, dark surroundings.
When is the sourdough starter ready to use?
Once your sourdough starter begins to ferment consistently every day, which should happen in 5 to 7 days on average, it’s ready to use!
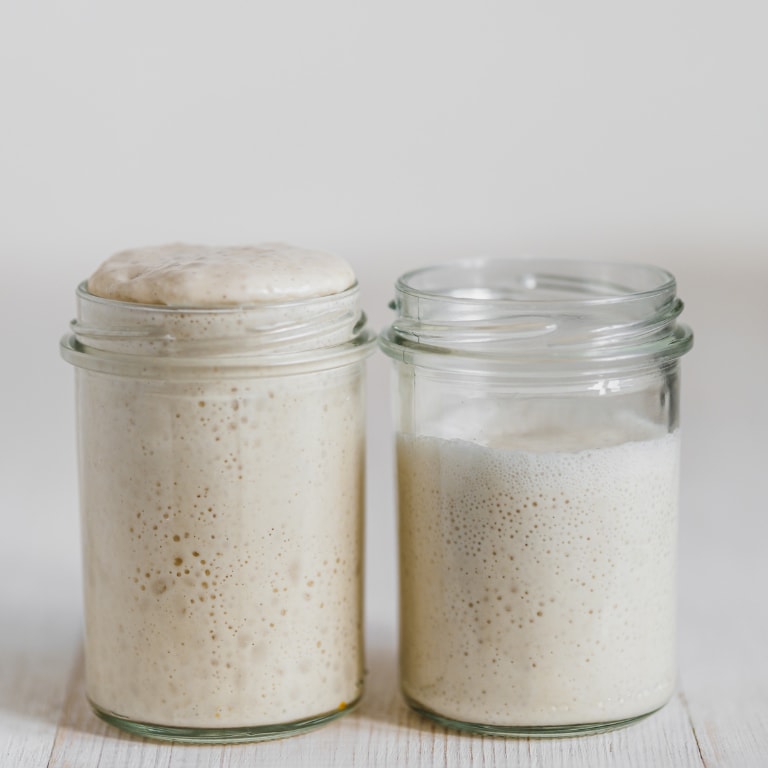
When the starter has doubled in size and bubbles are visible on the jar’s surface and sides, you can begin baking sourdough bread!
Fermentation will take longer in colder kitchens and shorter in warmer kitchens.
How can you determine the ripeness of your sourdough starter?
To find out if your starter is ready, run a float test. Transfer a tiny amount of the starter into a glass of water using a spoon. The starter is deemed sufficiently active and operational if it floats.
The ideal time to use the float test is 4 to 6 hours (or sometimes even 12 hours) after feeding, as this is when a starter is at its most active. This does not apply to a refrigerated starter; rather, it depends on the starter’s maturity and environment.
Why is my starter bubbling but not rising?
If the bubbles completely cover the top of your starter but it doesn’t rise, it might just be a wet mix, but it’s still healthy. See if your results change if you try cutting back on the water in your next feeding. Additionally, the kind of flour you’re using may prevent your starter from rising.
Why does my sourdough starter feel so sticky and wet?
Your sourdough starter is too young.
Your dough will be overly wet and sticky if you use a young sourdough starter, which is sometimes not quite ready to be baked with.
What is the clear, brown liquid on my starter?
You may notice clear or brown liquid accumulating on the top or inside your starter. Bakers call it “hooch” because it contains trace amounts of alcohol, which is a natural byproduct of fermentation. This indicates that your starter is hungry, so stir in or pour off the liquid (which may be very sour/pungent), discard some starter, and feed as usual.
Is it normal for my starter to smell weird?
Your starter will experience a variety of aromas as it grows, becomes hungry, and is fed. The following are some common smells and their meanings.
- Alcohol: It’s hungry; give it some food.
- Fruit/nail polish remover (acetone): It is hungry; feed it.
- Feet/Must: It’s probably new and undergoing some enzymatic changes. Continue feeding as usual.
- Yeasty/Bready: It’s ripe and well-fed, at the peak of its growth.
- Milky/Yogurty: Your starter contains lactic acid, which adds flavor and sourness.
- Tangy/Sour/Assertive: Your starter most likely contains more acetic acid, which is very tangy and results in a sourer bread. To make less sour bread, feed your starter more frequently and leave it out of the fridge for a few days before baking.
- Floury: When your starter is first fed and starts to rise, it will smell like flour and water.
NOTE: The smell of acetone does not always indicate that “your starter is hungry”. It can happen at any point during the feeding cycle, and even after the starter is fed, it frequently persists. There’s a chance that the bacteria in your starter are the kind that naturally produces acetone.
How can you tell if the starter in your sourdough is still safe?
Colors like pink, orange, or green, white fuzzy spots, or occasionally darker areas with white areas on top, are typical indicators of food deterioration and mold. I would advise discarding your starter and making a new one if you notice any of these signs.
My starter appeared to be dead after being extremely active for one or two days. What happened?
Most likely, nothing is wrong. Your starter will appear bubbly and lively when you first mix the flour and water because there may be a spike in enzymatic activity that causes some rapid growth. This activity will subside quickly, and even with consistent feeding, your starter might seem inactive for a few days. The good bacteria and yeast in your starter are developing during this period, becoming more powerful and resilient with each addition of fresh flour.
My starter is not operating at all. What’s wrong?
It’s normal if your starter doesn’t show any activity in the first few days. It’s also normal if it exhibits high activity on the first day and then becomes very quiet for a few days. By day four, there ought to be some bubbles and a vinegar-like smell in the container, possibly along with some rise and fall. If not, there may be a few reasons for this:
- Verify that the flour you’re using is unbleached. The natural enzymes that bleached flour contains and needs to nourish the wild yeast you are growing have been removed.
- Ensure that your starter is kept in a warm location.
- Keep your starter out of the sun’s direct beams; the heat and UV rays will not be good for your wild yeast.
- Keep feeding your starter, being careful to adhere to the recipe’s feeding schedule.
- Adding some whole wheat or rye flour to your starter can significantly increase activity if you’ve tried all of the above and you’re still not seeing any.
If my house is cold, how can I make it warm?
Although starter can grow anywhere that is “room temperature,” bakers typically have the best success in environments that are between 70 and 80°F. Anything colder will slow down the fermentation process and cause your starter to become less ready. I take out my digital thermometer and check the temperature of the air in my kitchen before feeding my starter. If any area is colder than 70°F, I make a warm area. There are several methods you can use to create a warmer environment for your starter to grow in if your home or apartment is typically cooler:
- Place your starter in an oven that is off but has the oven light on. Often, the enclosed space and the heat emitted by the oven lightbulb are sufficient to raise the air’s temperature and produce a warmer atmosphere. To ensure that you don’t unintentionally heat your starter and its container, write a note on the oven.
- Place your starter and a mug of hot water in the microwave. To start, preheat a mug of water in the microwave for one to two minutes. Then, put the starter inside with the door slightly ajar.
- Place your starter in an Instant Pot or similar type cooker and set it to the “low” yogurt setting. Gently place the lid on top, but do not press it down.
How to Make Sourdough Starter
Description
If you're searching for the easiest method to kickstart a sourdough culture, look no further! This straightforward, easy-to-execute recipe is perfect for you! You'll be able to whip up the most delicious sourdough loaves, pizzas, bagels, and more for your loved ones in no time!
Ingredients
Instructions
-
Day 1
In a half-gallon jar, mix 3/4 cup flour and 1/2 cup warm water flour.
After giving the mixture a good stir, place a lid or breathable cloth on top of the jar and fasten it with a rubber band. Keep the container in a warm place that is approximately 75°F (24°C) for 24 hours.
-
Day 2
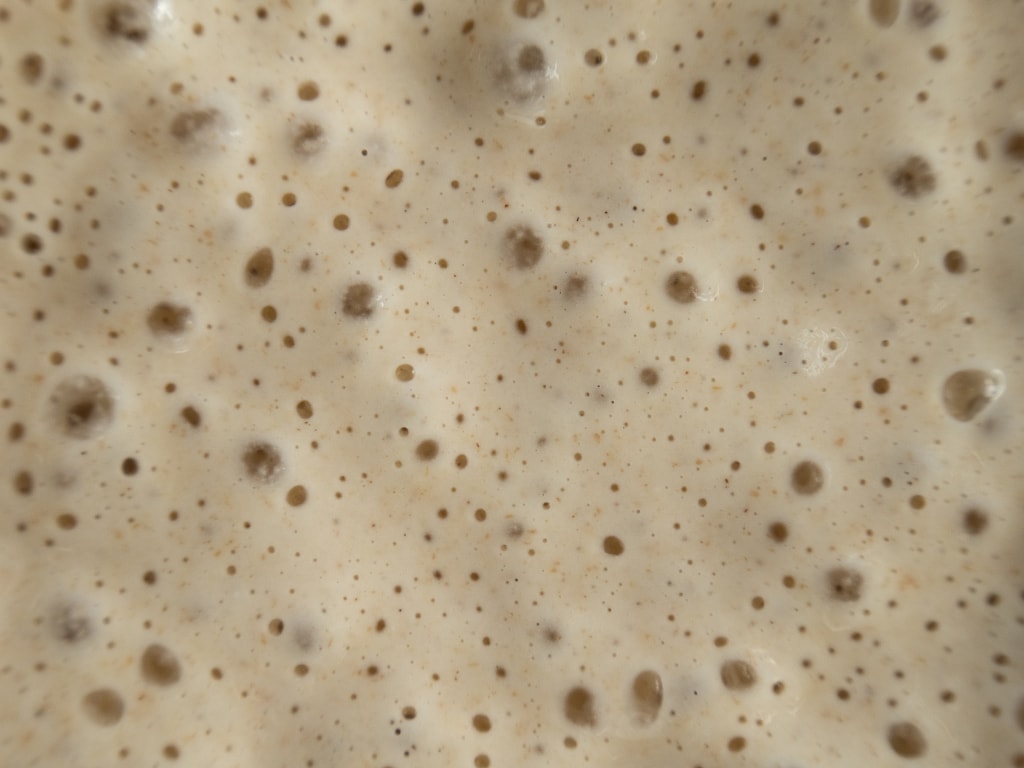
Hopefully, bubbles will start to appear at the 12 or 24 hour mark, which is a sign that microorganisms are present.
Stir the starter to help get some air into it. Place a lid on the jar and leave it in a warm place for an additional 24 hours.
Feeding your sourdough starter every 12 hours will speed up the rate at which its organisms multiply. Feeding it every 24 hours will take a little longer, but depending on your time commitment, it might be more sustainable.
-
Day 3
At this stage, you should discard 1/2 of the starter before each feeding and putting it in the compost or trash or use it in a discard recipe) to allow the starter you do have to grow more organisms without filling your jar to the brim.
Use 3/4 cup flour and 1/2 cup warm water to repeat the feeding. Mix well, cover, and leave for a further 12 to 24 hours.
-
Day 4-7
Repeat the last feeding schedule every day for 7 to 10 days, until your starter is active, bubbly, and double in size.
After 7 to 10 days your sourdough starter should have sufficient yeasts and bacteria for baking.
Did you make this recipe?