
Easiest Sourdough Bread Recipe for Beginners
 View Gallery
4 photos
View Gallery
4 photos
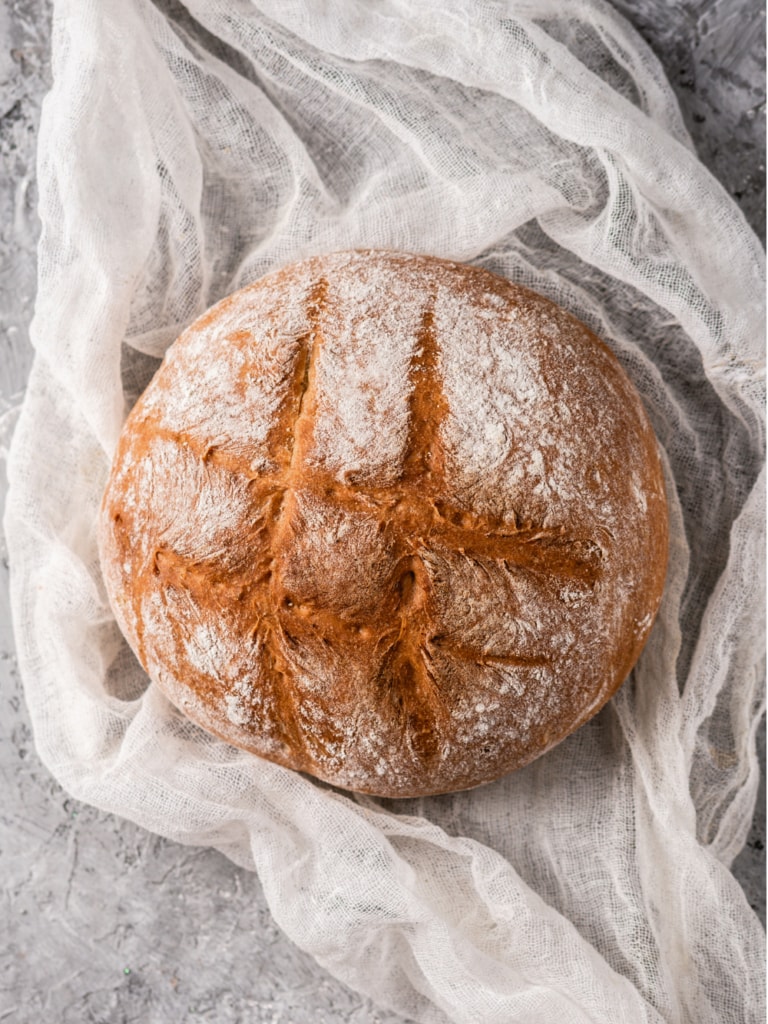
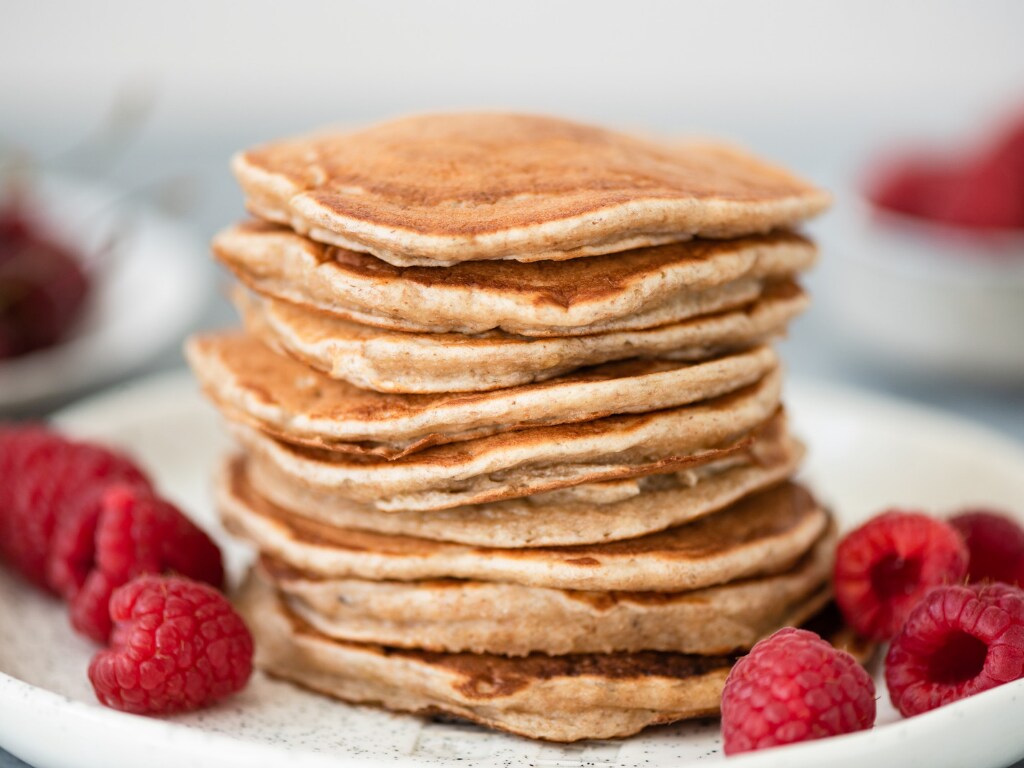
This recipe is for you if you enjoy freshly made sourdough bread with a light, airy crumb, and a golden, crisp crust. It’s also one of the best and easiest recipes for homemade sourdough bread. You will find instructions for each step of the process below.
Let’s find out how to make sourdough bread the easy way!
Related recipes: How to Make Sourdough Starter
What is sourdough bread?
Sourdough bread is naturally leavened, which means it does not require commercial yeast to rise. It is produced through the fermentation of dough with wild Lactobacillaceae (bacteria) and yeast. Fermentation produces lactic acid, which imparts a sour flavor and improves storage properties.
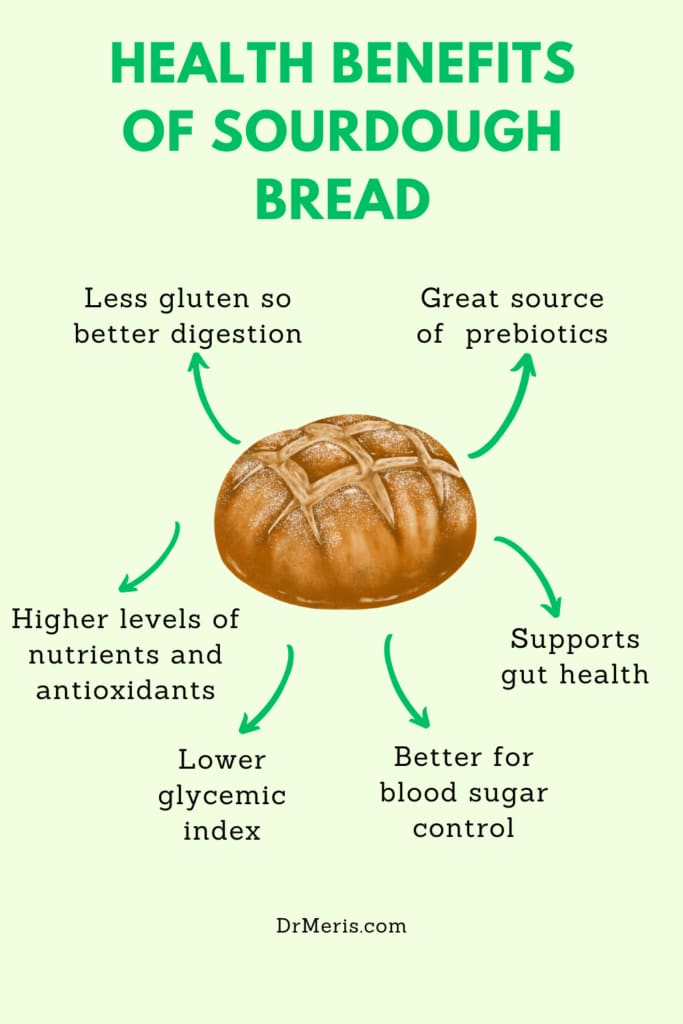
Sourdough bread is a healthier substitute for ordinary white or whole wheat bread. It is more easily digested and nutrient-dense despite having similar amounts of phytate (aka phytic acid, a substance present in plant seeds with antioxidant properties in addition to having the ability to decrease dietary nutrient absorption).
In addition to keeping your gut flora happy, prebiotics may also lessen the likelihood of blood sugar spikes. Instead of using baker’s yeast, sourdough uses a combination of lactic acid bacteria and wild yeast to leaven the dough. Compared to bread made with baker’s yeast, it is easier to digest, lower in gluten, higher in nutrients, and less likely to cause a blood sugar spike.
What makes sourdough better?
Breaks down gluten.
Sourdough breads are easier to digest due to the longer rising/soaking time, which breaks down wheat proteins into amino acids. This is why some people with gluten sensitivity can eat sourdough wheat bread.
More nutritious.
Sourdough breads undergo fermentation, which consumes many of the grain’s simple sugars. This reduces the bread’s impact on blood sugar. Fermentation enhances the bread’s nutritional value, particularly in B vitamins.
Naturally preserves bread.
Fermentation produces lactic acid, which enhances the bread’s flavor and helps digest the grain. Acetic acid inhibits mold growth, allowing bread to be stored longer.
Neutralizes the antinutrients.
Sourdough contains bacteria that activate phytase, which breaks down phytic acid, an anti-nutrient found in grains and seeds. Phytic acid can bind with minerals and remove them from the body, making it easier for the body to retain them.
Sustainability
Sourdough bread can be made with simple ingredients, including those produced at home. Instead of buying yeast packets for each loaf of bread, simply add a plop of your homemade starter made from flour, water, and the bacteria and yeasts in your environment. Say goodbye to yeast packets.
Supplies beneficial bacteria.
The process of fermenting sourdough bread increases the number of good bacteria both in the bread and in your body after consumption.
Reduction of yeast.
Sourdough bread’s beneficial bacteria work to lower yeast populations, greatly reducing the risk of infection and/or overgrowth.
Is it OK to consume sourdough bread daily?
Even though you could eat sourdough every day, doing so might not be very healthful. Moderation and balance are characteristic of a healthy diet. The rest of your diet will determine whether or not eating sourdough every day is healthy for you.
Equipment
To start making sourdough bread, you’ll need:
- Large mixing bowl
- Wooden or plastic utensil for bread mixing
- Kitchen scale or measuring cups and spoons
- Clean work surface for kneading bread
- Dutch oven or baking pan or sheet
- Cooling rack
Ingredients required
The simplicity of sourdough bread requires only a few staple ingredients;
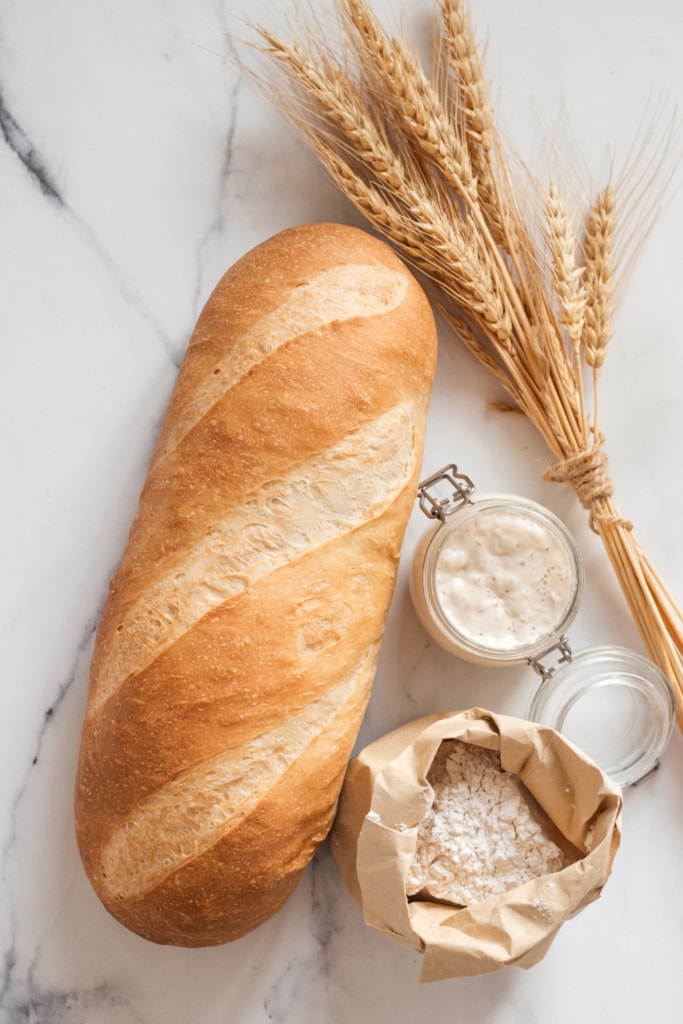
Sourdough starter, bread flour, water, and salt.
What is a sourdough starter?
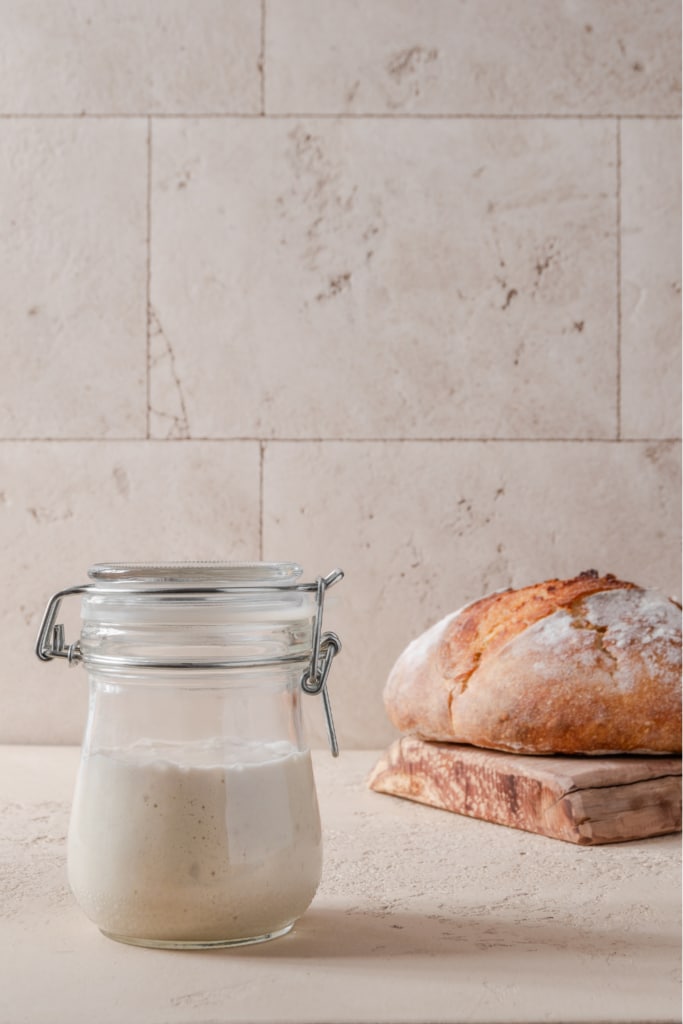
A sourdough starter is a living, fermented culture of fresh flour and water. Once combined, the culture will begin to ferment and cultivate the naturally occurring yeasts and bacteria in our environment.
A sourdough starter is made by combining flour and water in a jar. Yeast and bacteria from the surrounding environment feed on the flour, causing the yeast and bacteria population to grow within the mixture.
With consistent feedings, the starter grows stronger and can eventually be used to make sourdough bread. Building a new sourdough starter from scratch takes between 7 and 14 days, depending on the temperature of your kitchen.
Learn how to make your own sourdough starter!
Should I make my own sourdough starter or use an established one?
After following instructions to make your own starter, you might discover that it tastes bad, smells bad, or doesn’t produce very tasty bread or other baked goods. An established culture enters the picture here.
An established culture is easier because it can be started more quickly and easily. It is also more dependable because it already contains live yeasts that are robust, stable, and active due to their long history of propagation.
Moreover, an established culture can ensure a bread product with a more pleasing flavor due to its established bacteria and yeast.
So unless you have been successful with making your own sourdough starter, you should use an established one.
How to measure the ingredients?
Bread baking combines science and art. Using exact recipes and formulas ensures consistent results. If you’re a free-spirited baker, you can learn the technique and use whatever ingredients you have available.
To understand the science of measuring ingredients, it’s best to begin with precision. Ingredients can be measured using either volume (cups, tablespoons) or weight (ounces, grams).
To accurately measure flour volume, use a measuring cup and level it with the back of a knife. You can accomplish the same thing with measuring spoons.
Sourdough starter instructions
Dehydrated sourdough starter
You can use this sourdough starter at any point over the next few months. The starter should be kept dry and cool.
When feeding your sourdough starter, use filtered, non-chlorinated water whenever possible.
To activate this starter, use the same type of flour (white, whole wheat, rye, etc.) that the starter was grown in. You can feed your starter and bake with a different type of flour if you’d like after it’s fully activated.
Activating dehydrated sourdough starter
Step 1:
Transfer the contents of the package into a clean, wide-mouth canning jar (quart or larger) or similar container.
Step 2:
Stir in 1/4 cup of room temperature tepid water. Incorporate 1/4 cup flour and mix thoroughly. Make sure the mixture contains a substantial amount of air. Loosely cover. You may place a plastic lid on top or a towel secured with a rubber band.
Step 3:
Keep for about 12 to 18 hours in a warm place at any temperature from 70° to 85°F (21° to 30°C). The starter will fire faster in warmer environments. A food dehydrator with a high shelf or an oven with only the pilot light or oven light turned on can both work effectively.
Step 4:
Add a scant 1/2 cup flour and 1/2 cup water, and mix. Make sure the mixture contains a considerable amount of air. After 12 hours, cover and put the object back in a warm place. Since active sourdough starter can bubble over, make sure the container is big enough and place a cloth or paper towel underneath.
Step 5:
Throw away all but 1/2 cup of the flour and water mixture. Stir in slightly less than 1 cup flour and 1/2 cup water. Until the mixture becomes light and bubbly, repeat this procedure every 12 hours. This process can be over the first few days if the mixture is kept fairly warm.
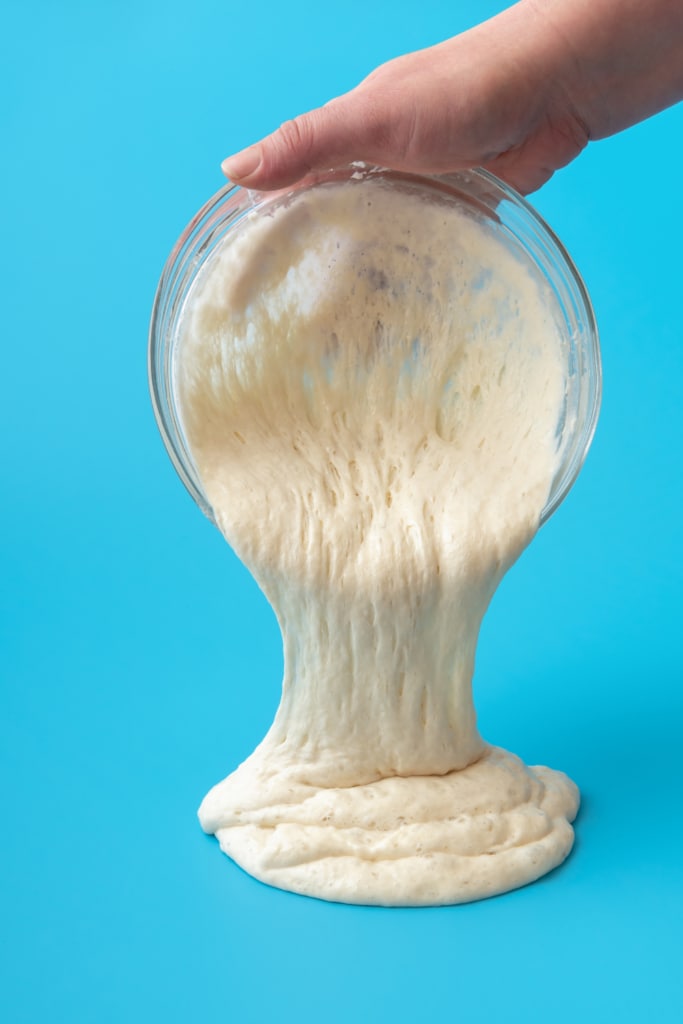
When is the sourdough starter ready to use?
Once your sourdough starter begins to ferment consistently every day, which should happen in 5 to 7 days on average, it’s ready to use!
When the starter has doubled in size and bubbles are visible on the jar’s surface and sides, you can begin baking sourdough bread!
Fermentation will take longer in colder kitchens and shorter in warmer kitchens.
You can run a float test to find out if the starter is ready. Put a tiny bit of the starter in a water glass. It is ready to use if it floats. Give it a few more feedings if it sinks to the bottom, then try again!
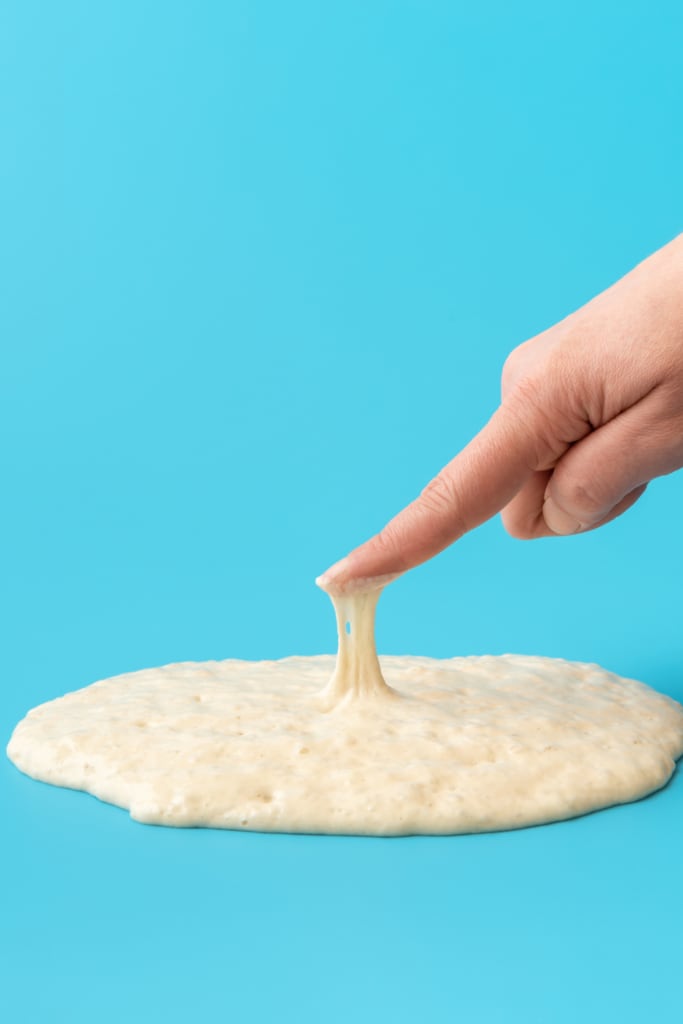
Why does my sourdough starter feel so sticky and wet?
Your sourdough starter is too young.
Your dough will be overly wet and sticky if you use a young sourdough starter, which is sometimes not quite ready to be baked with.
Dough basics
If you have never worked with bread dough, you are in for a real treat. If you’ve been baking for a while, you know how satisfying it is to work your hands into the dough and produce a stunning finished loaf.
Mixing
The first step in making sourdough bread is to combine the ingredients.
Begin with a small amount of flour and gradually increase it, adjusting as needed based on the dough texture. This calculation considers your starter’s hydration level and the humidity in your area on the given day.
Keep in mind that a moist dough is preferred over a dry dough. The dough should form a ball and pull away from the bowl while remaining moist.
Kneading
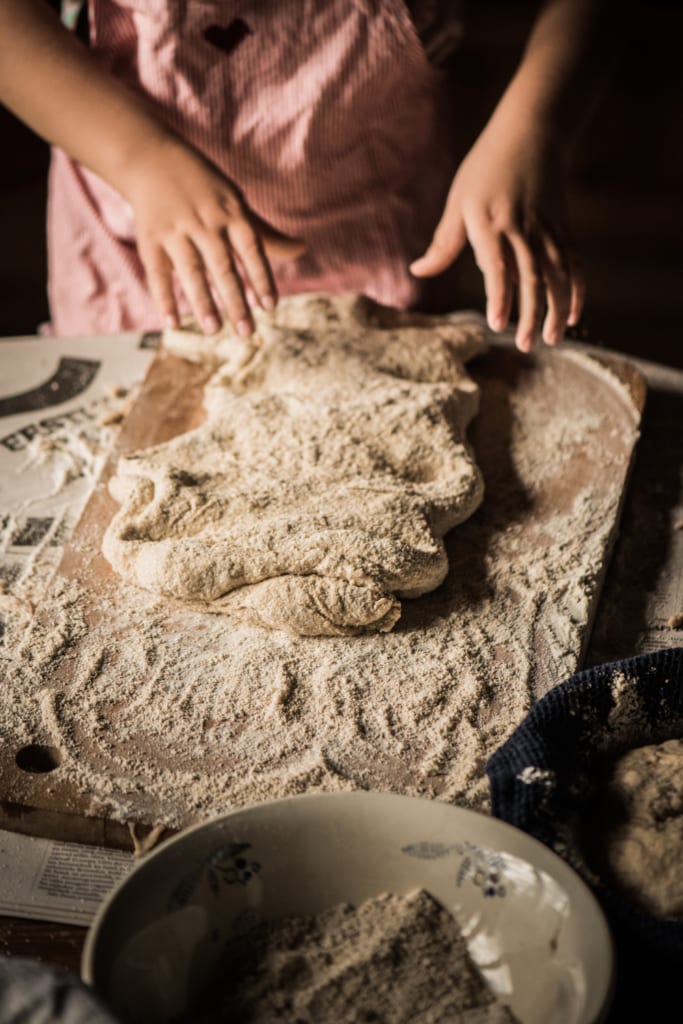
Once you have a ball of dough, you can start kneading.
Kneading involves working the dough until the gluten becomes elastic, trapping gases that cause the bread to rise. It requires a clean, flat surface. In a pinch, a large, wide bowl can suffice. You’ll also need extra flour to keep things from sticking. To begin, sprinkle a small amount of flour on your work surface.
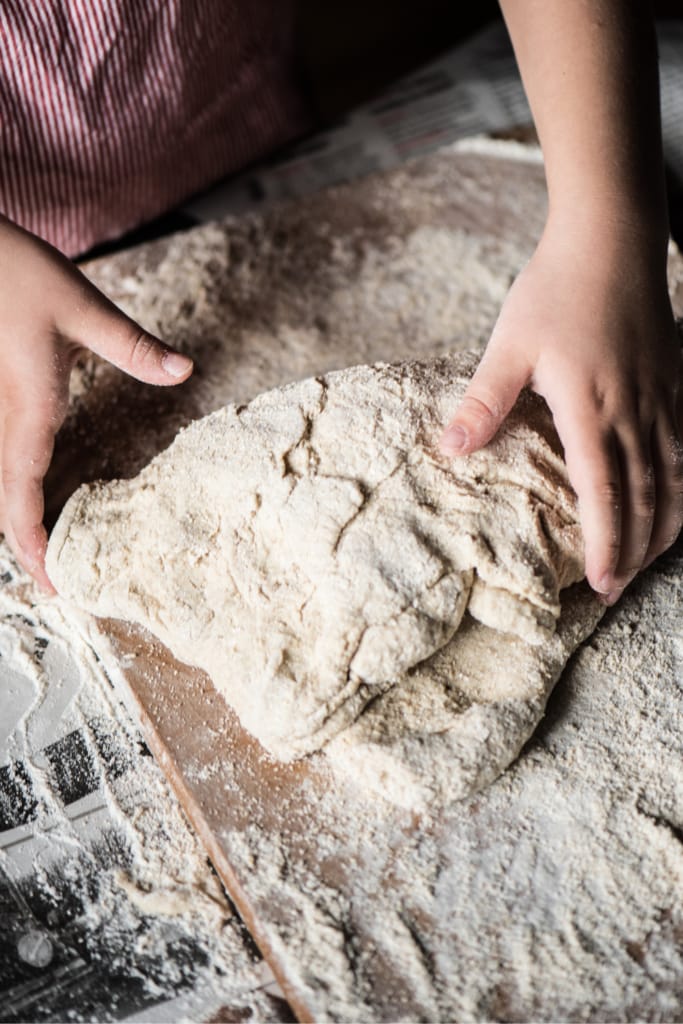
Gently push the ball of dough away from you with your palm. Roll it on top of itself and repeat.
Knead your bread for 5-20 minutes, depending on the flour, until the dough is elastic and stretchy.
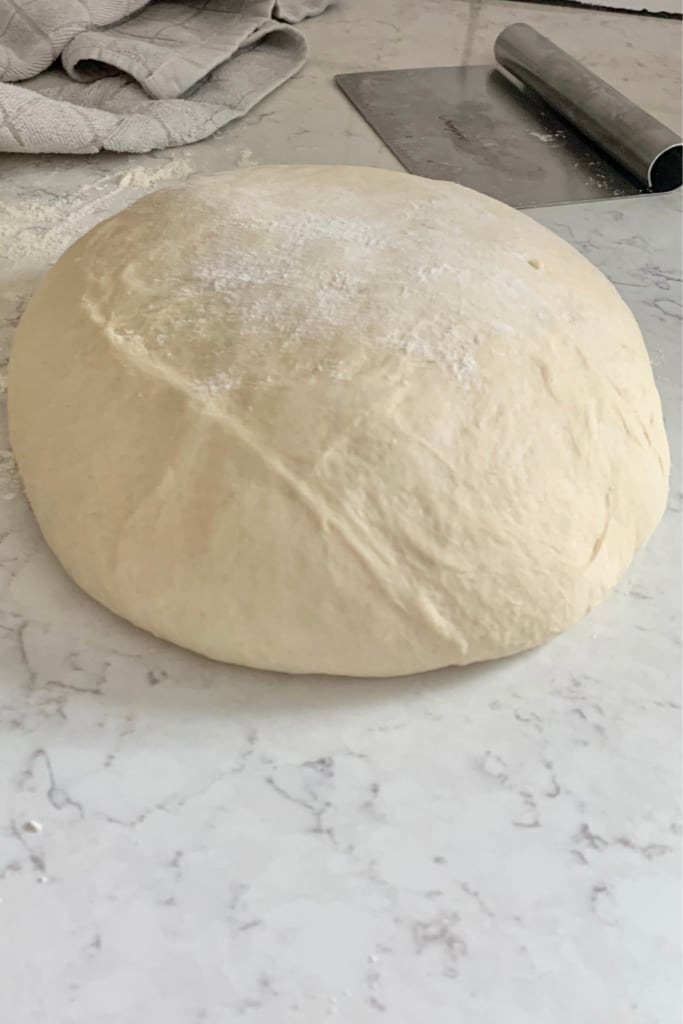
Proofing
Proofing involves giving the dough time and warmth to allow the sourdough culture to leaven the bread. Sourdough (as opposed to baker’s yeast) does not require a second proofing, unlike many recipes that require both in a bowl and the baking pan.
After kneading the dough, shape it into a loaf for the pan size. Cover with a damp cloth or paper towel and place in a warm location to rise (70° to 85°F, about 21° to 30°C).
Baking
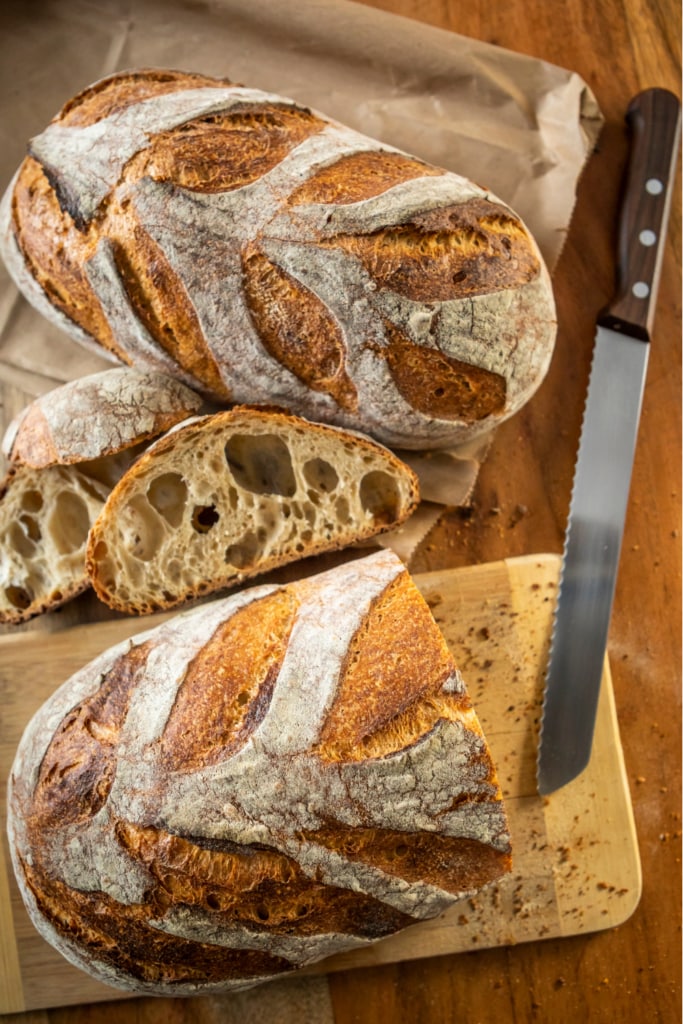
If your dough proofed properly, you should now have a beautifully risen dough. It is now ready to be baked.
First, preheat your oven as instructed by the recipe. If you want to induce a little more rise in the oven, you can cut your loaf with an extremely sharp knife. All you have to do is pop your bread into the oven and bake it there until the inside temperature reaches 210 °F (about 100 °C).
Before slicing, take the bread out of the pan and let it cool completely.
Tips
Here are 14 tips for working with traditional sourdough:
Tip 1:
Make sure your sourdough starter is fully active before baking. Read the instructions above.
Tip 2:
Whenever possible, use a scale to measure ingredients instead of measuring cups; your measurements will be more precise, and your results more consistent.
Tip 3:
Begin kneading the dough while it is still slightly sticky. If the dough is not sticky, it may contain too much flour, resulting in dry bread. To knead, use wet hands and a dough scraper. To make kneading easier, add flour in small amounts at a time.
Tip 4:
Take 15 to 20 minutes to manually knead your dough. This can be done in sections, with each section lasting five to ten minutes of kneading, followed by a 10 to 20 min-break before continuing.
Tip 5:
When kneading the dough, try not to use a mixer. Household mixers overheat the dough and ineffectively activate the gluten in the flour.
Tip 6:
If using a mixer, aim to knead the dough by hand for the final five minutes or so. Once you can stretch a small piece of dough until it becomes thinner and thinner until light passes through it like a window pane, you will know you are done.
Tip 7:
Continue kneading if it breaks before being stretched that thin.
Tip 8:
Once you’ve finished kneading, form your loaf, cover it, and leave it to rest for 4 to 24 hours, or even longer, depending on the temperature outside and the type of sourdough starter you’re using. Wild yeast does not rise as quickly as commercial yeast. The final step’s timing affects the final product’s sourness as well. A bread that rises for 24 hours will be far more sour.
Tip 9:
Use brown rice flour and thick linen cloth if you plan to shape your dough in a proofing basket to prevent sticking.
Tip 10:
A second rise, or proofing, period is optional if a shorter rise period (4 to 12 hours) is being used. To achieve a second rise, just punch down and reshape the dough after the first rise, then let it rise once more.
Tip 11:
If at all feasible, bake the sourdough bread on a baking stone. For up to an hour, the stone can be heated in the oven.
Tip 12:
To check if the bread is done baking, use a thermometer (internal bread temperature should range from 195° to 210°F, about 90° to 100°C). When you thump the bread, it should sound hollow.
Tip 13:
Before slicing, let the bread cool for at least 30 minutes.
Tip 14:
You can add a tiny bit (just a tiny bit!) of instant yeast if you don’t have eight to twenty-four hours to let the bread rise. (Ensure that the instant variety is used.) The sourdough’s complex flavor will still be present, but the rising time will be significantly faster.
Easiest Sourdough Bread Recipe for Beginners
Description
If you are using dehydrated sourdough starter, read the instructions above to learn how to activate dehydrated sourdough starter.
Ingredients
Instructions
-
Prepare the dough
Put 375 g of water and 100 g of the active starter into a large mixing bowl and stir to evenly distribute the starter.
Add the salt and flour. Blend until well combined, completing by hand if needed to create a rough dough. Cover with a damp towel and leave to rest for 1 hour at room temperature.
-
Stretch and fold
To avoid sticking, moisten your hand slightly with water. Grasp a dough corner and bring it up into the center. Continue folding the dough in this manner four or five more times. After giving the dough 1 hour to rest, proceed to stretch and fold it once more.
-
Bulk fermentation
Place the bowl on your kitchen counter, cover it, and let the dough rise for 8 to 10 hours, or less depending on your kitchen temperature. When the dough is ready to shape, it will have risen by about 50–75%, not doubled.
(The dough might have been over-proofed if it has doubled in size and/or is difficult to shape. On your subsequent bake, shorten the rising time.)Living in a warm, humid climate may shorten the bulk fermentation process. The best way to tell when the bulk fermentation is finished is to use visual cues (an approximate 50% increase in volume) rather than time. -
Shape
Place the dough onto a surface that has been lightly floured.
Gently roll the dough into a circle by folding the top down to the center, turning it, and repeating the process until the dough is shaped like a complete circle.
-
Rest
Give the dough 30 minutes to rest, seam side up. In the meantime, dust a bowl or proofing basket with flour.
Again, shape it as in step 4. Seam side up, place the round in the bowl that has been lined.
-
Proof
Cover the dough lightly with a towel and let it rise for 4 to 24 hours. If desired, the dough can be proofed for 4 to 12 hours before being reshaped and allowed to rise again. However, a second proofing period is not necessary.
A second rise, or proofing, period is optional if you follow a shorter rise period (4 to 12 hours). To achieve a second rise, just punch down and reshape the dough after the first rise, then let it rise once more. -
Preheat
Preheat the oven to 450°F (230°C), with the dutch oven inside, 30 minutes before baking. You may also use a baking pan or sheet
-
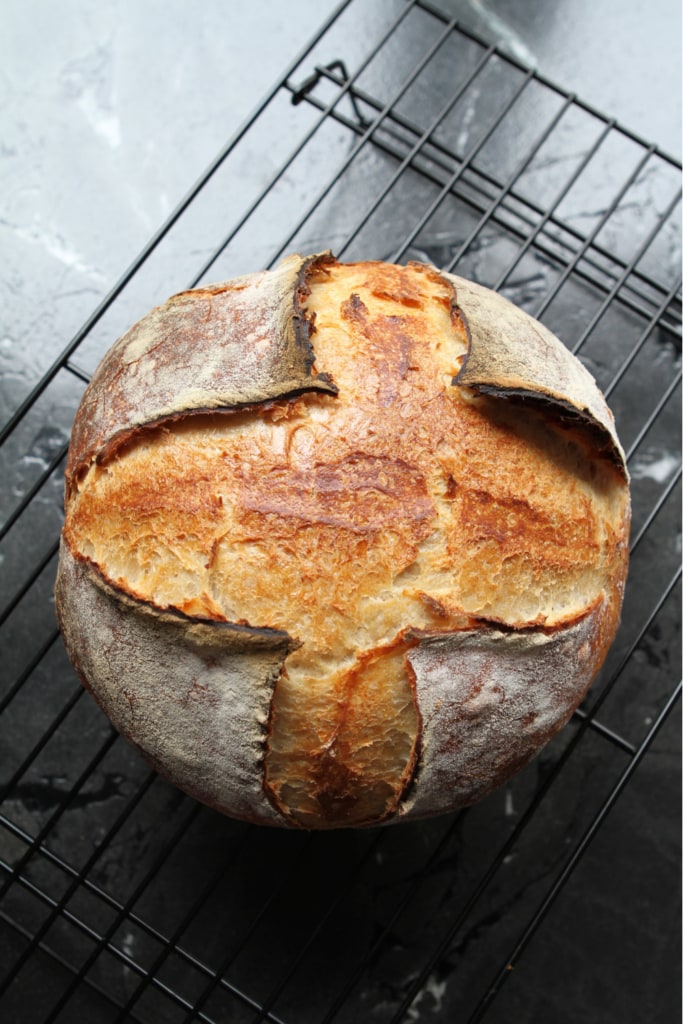
Score
Remove carefully the hot Dutch oven (or the baking pan or sheet).
To release the dough, place a parchment over it and flip the bowl.
Dust the top of your loaf with flour before scoring.
Score the dough however you like; a simple "X" works well. You can also use the tip of a small knife or a razor blade.
Gently place the dough into the Dutch oven using the parchment paper.
-
Bake
Keep the oven's temperature at 450ºF (230ºC). Cover the Dutch oven and and bake the dough for 30 minutes.
Take off the lid, reduce the oven's temperature to 400°F (200°C). Bake for another 30 minutes, until the crust is golden brown.
For the final five to ten minutes of baking, remove the loaf from the pot if needed and bake it directly on the oven rack.
The internal temperature of the bread should reaches 210°F (100°C). You may check it using a digital food thermometer.
-
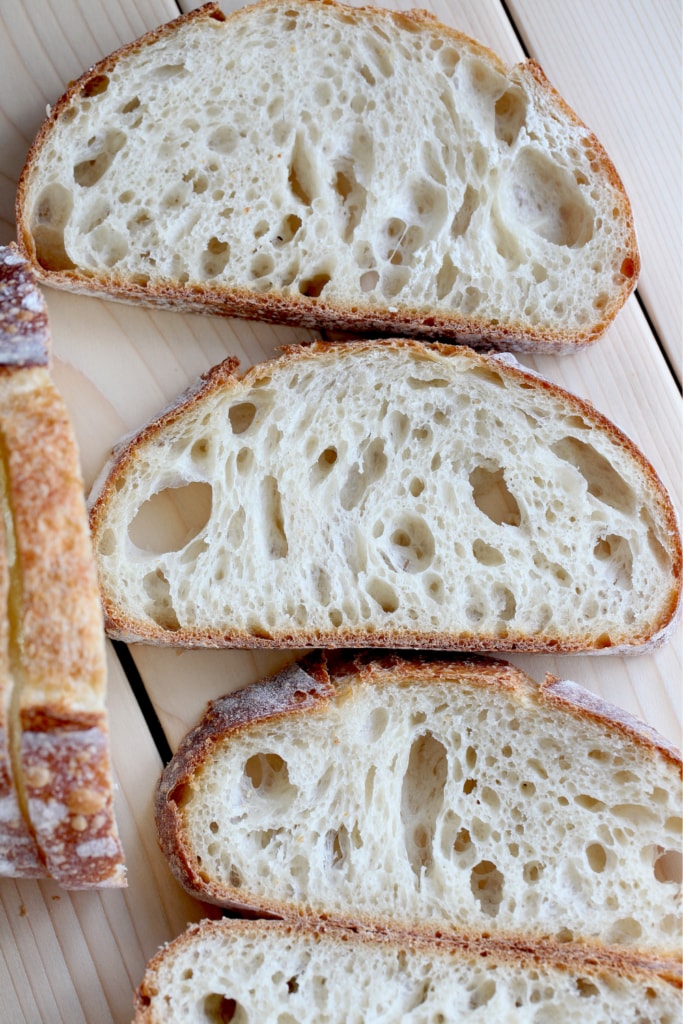
Cool
Place the baked bread on a cooling rack for 1-2 hours before slicing. The bread will continue to cook inside during this time. If you cut into it too soon, you'll get a gummy loaf.
-
Store
Store the bread at room temperature in a bread bag, wrapped in a kitchen towel, or in a container. Do not store in the refrigerator.
You can freeze full loaves or individual slices wrapped tightly in plastic wrap and stored in a freezer-safe container for up to 3 months.
Serving Size 1 slice
- Amount Per Serving
- Calories 149kcal
- % Daily Value *
- Total Fat 1g2%
- Saturated Fat 1g5%
- Sodium 323mg14%
- Potassium 25mg1%
- Total Carbohydrate 72g24%
- Dietary Fiber 3g12%
- Sugars 1g
- Protein 6g12%
- Calcium 11 mg
- Iron 2 mg
* Percent Daily Values are based on a 2,000 calorie diet. Your daily value may be higher or lower depending on your calorie needs.
Note
If you are using dehydrated sourdough starter, read the instructions above to learn how to activate dehydrated sourdough starter.
Frequently Asked Questions
Overbaking or underbaking are two possible baking errors in bread.
While the bread is baking, add a little steam to the oven. Before putting the loaf in, lightly mist the oven's walls with water (taking care not to get any on the lightbulb). Repeatedly mist during the first fifteen minutes of baking. High humidity produces a crispy crust. Steam emitters are a common feature in commercial bakeries' ovens.
Your bread is not fully baked. To check if the loaf is done, stick a thermometer all the way into the center. Increase the baking temperature and/or baking time.
It's also possible that the dough contained too much liquid. Try increasing the flour the next time.
Did you make this recipe?


This is my favorite sourdough bread recipe. I tried many other ones but all failed!
The only problem I have my bread is a little bit dense and not too airy.